Detecting pose similarity between two videos with JavaScript
programming javascript machine-learningMachine Leaning is on the rise. More and more frameworks have become accessible to the public. Pose estimation, or the ability to detect humans and their poses from the video data, is one of the most difficult tasks in machine learning. Although today there are at least 2 frameworks that can do it quite well. See a comparison.

Let’s try to build a sample app that would take a video as an input and compare human pose with the pose in another video.
A little background
I really like basketball and try to play it once in a while. But I’m not that good at shooting. Seriously, even small kids shoot better than me. If I want to be a decent shooter, I’d have to improve. There are lots of training videos, that basically say the same thing — improve your posture. I could do it manually: by shooting, taking video and comparing the video to the goal video. But that’s not an efficient way to do it. Instead let’s create an app that would automate this process.
Our goal is to write JS application that would analyze provided video, extract pose movements and compare it to the pose movements of the NBA athlete Steph Curry.
Getting started
To simplify bootstrapping we will use React in the form of react create app. It bundles everything we need, including the node server:
npx create-react-app my-app
cd my-app
npm start
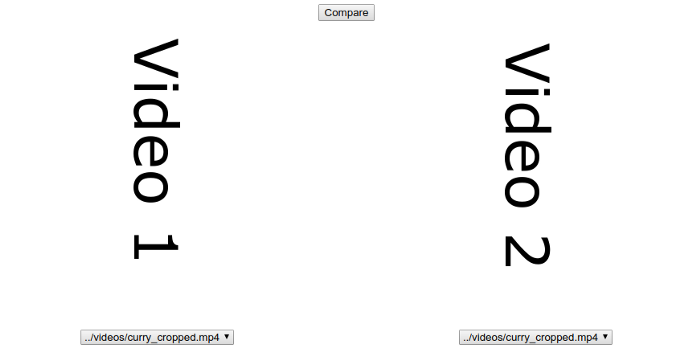
Let’s make a simple markup where we will compare 2 videos next to each other
<div>
   <fieldset disabled={!this.state.loaded}>
      <div className=”row”>
         <div className=”container”>
            <video id=”video” width=”400" height=”400" muted controls style=\{\{display: 'none'\}\}>
              <source src={this.state.src1} type=”video/mp4"/>
            </video>
            <canvas id=”output” width=”400" height=”400"/>
            <div>
               <select
                  defaultValue={this.state.src1}
                  onChange={e => this.setState({ src1: e.target.value })}>
                  {
                    videoFiles.map(([filename, path]) => (
                    <option key={path} value={path}>
                       {filename}
                    </option>
                    ))
                  }
               </select>
            </div>
         </div>
         <div>
            <button onClick={this.doCompare}>Compare</button>
         </div>
         <div className=”container”>
            <video id=”video2" width=”400" height=”400" muted controls style=\{\{display: 'none'\}\}>
              <source src={this.state.src2} type=”video/mp4"/>
            </video>
            <canvas id=”output2" width=”400" height=”400"/>
            <div>
               <select
                  defaultValue={this.state.src2}
                  onChange={e => this.setState({ src2: e.target.value })}>
                  {
                    videoFiles.map(([filename, path]) => (
                      <option key={path} value={path}>
                         {filename}
                      </option>
                    ))
                  }
               </select>
            </div>
         </div>
      </div>
   </fieldset>
</div>
We also can easily find Curry’s video on the internet.
Now that we have markup and videos we have to somehow compare them. How do we do this?
Comparing the videos
To compare the shapes of two objects, the objects must be first optimally “superimposed”. Procrustes superimposition (PS) is performed by optimally translating, rotating and uniformly scaling the objects. In other words, both the placement in space and the size of the objects are freely adjusted. The aim is to obtain a similar placement and size, by minimizing a measure of shape difference called the Procrustes distance between the objects.
Luckily just recently Google released a perfect tool to do this:
Typically, working with pose data means either having access to special hardware or having experience with C++/Python computer vision libraries. We thus saw a unique opportunity to make pose estimation more widely accessible by porting an in-house model to TensorFlow.js, a Javascript library that lets you run machine learning projects in the browser. We assembled a team, spent a few months developing the library, and ultimately released PoseNet, an open-source tool that allows any web developer to play with body-based interactions, entirely within the browser, no special cameras or C++/Python skills required.
Posenet is a framework developed by Google. Or, to be more exact, is a model for Tensflow framework. That’s exactly what we need for JS application.
Now that we have tool for pose detection, we need to compare the poses in each video. Let’s make things simple — we will compare poses by frame. The most intuitive approach is to compare each frame side by side. But then we have to make some constraints: videos have to be the same length, the movement should start exactly at the beginning of the video, and so on. In this case our application would not really be practical to use.
More generic approach is to analyze goal video first, create a map of all poses and then search the similarities inside the map. The more matches we find, the higher the resulting similarity. Now what is a match?
A match is the image we return, based on the pose data we receive, when a user strikes a pose. When we talk about the ‘pose data’ coming out of PoseNet, we’re referring to a set of 17 body or face parts, such as an elbow or a left eye, that are called “keypoints”. PoseNet returns the x and y position of each keypoint in relation to the input image, plus an associated confidence score (more on this later).
Building the app
We already have a simple markup. Let’s add some work.
First load all the poses from the model. This will bootstrap TenserFlow and loads all the data for PoseNet model.
setup = async() => {
 const net = await posenet.load();
 return net;
};
When we have the pose data, lets try to analyze the video and find poses in it.
let i = 0;
let allPoses = [];
const pose = await this.net.estimateSinglePose(video, {
 flipHorizontal: true,
 decodingMethod: 'single-person'
 });
 allPoses = allPoses.concat(pose);
 if (!video.paused) {
  requestAnimationFrame(poseDetectionFrame);
 }
}
video.onplaying = () => {
 poseDetectionFrame();
}
return new Promise(resolve => {
 video.onended = async () => {
 const vectorMap = allPoses.map(pose => {
 return convertPoseToVector(pose);
 });
 const vptree = await buildVPTree(vectorMap);
 resolve(vptree);
 }
});
We are returning a Vantage Point Tree with all the poses we found. A vantage-point tree recursively splits data into two categories: those that are closer to some vantage-point than the threshold, and those that are farther away. This recursive sorting creates a tree data structure that can be traversed.
Let’s talk about vp trees in a bit more detail. Don’t worry if you don’t understand this next description completely — the important thing to understand is the general principle. We have a set of points in our data space and choose one (it can be at random!) to act as our root (in the image above, it’s point 5). We draw a circle around it, so some of the data is inside and some data is outside. We then choose two new vantage points: one inside our circle, and one outside it (here, 1 and 7). We add these two points as children to our first vantage point. Then, for both those points, we do the exact same thing: draw a circle around them, choose one point inside and one point outside their circle, use those vantage points as children, and so on. The key is that if you start at point 5, and find that point 7 is closer to where you want to be than point 1, you know you can discard not only point 1, but indeed its children as well.
When we have tree the search is as easy as.
 const match = findMostSimilarMatch(this.vptree, pose);
 function findMostSimilarMatch(vptree, userPose) {
  const pose = convertPoseToVector(userPose);
  // search the vp tree for the image pose that is nearest (in cosine distance) to userPose
  let nearestImage = vptree.search(pose);
  // return index (in relation to poseData) of nearest match.
  return {
   index: nearestImage[0].i,
   distance: nearestImage[0].d,
  };
 }
When we find a match we return it’s index and distance. Based on distance we can determine the pose similarity, the shortest being the most accurate. The only thing that is left is to analyze the input video, which we again can do with:
const pose = await this.net.estimateSinglePose(video, {
 flipHorizontal: true,
 decodingMethod: 'single-person'
});
Now after all the hard work let’s look at the final result.

We could go even further. Use react native or Webview to create a mobile app and analyze the video as soon as it’s uploaded. But the application that we built is a good first step.
Conclusion
Human Pose Estimation is an evolving discipline with opportunity for research across various fronts. Recently, there has been a noticeable trend in Human Pose Estimation of moving towards the use of deep learning, specifically CNN based approaches, due to their superior performance across tasks and datasets. One of the main reasons for the success of deep learning is the availability of large amounts of training data, especially with the advent of the COCO and Human3.6M datasets.
Additional links
- https://medium.com/tensorflow/move-mirror-an-ai-experiment-with-pose-estimation-in-the-browser-using-tensorflow-js-2f7b769f9b23
- https://towardsdatascience.com/human-pose-estimation-simplified-6cfd88542ab3
- https://medium.com/tensorflow/tf-jam-shooting-hoops-with-machine-learning-7a96e1236c32
Source code - https://github.com/B1aZer/CV-Posture-Sample/blob/master/react-app/src/
Jun 2019